Using Codestral to Summarize, Correct and Auto-Approve Pull Requests

Michael Louis
CEO & Founder


Using Codestral to Summarize, Correct and Auto-Approve Pull Requests
At Cerebrium, we are constantly monitoring the time it takes a task to get from in-progress to production. It’s an extremely important metric since it leads to happy customers (engineers like companies that ship) and it leads to increased momentum/energy for our team. We found a major blocker was the time it takes for PR’s to get reviewed and therefore merged since
Engineers don’t check their emails regularly to know that pull requests are ready/updated.
Engineers mute noisy slack channels where the Github notifications are posted
Summary: Engineers don’t do anything outside of writing code and listening to bangers!
With the release of Mistrals new Codestral model we were keen to put together a mini-app that will automatically approve PR’s that meet the following conditions:
The PR passes all unit and e2e tests
Codestral’s recommended changes are categorised as minor
Codestral thinks the complexity of the PR is low
In this tutorial, we will implement this application on Cerebrium, while interacting with one of our Cerebrium repositories. Lastly, this bot will summarize the pull request so that when engineers do look at it, they have some added context.
You can find the final code the final code on GitHub.
Adding Secrets to Cerebrium
To authenticate securely with external resources using authentication keys/tokens, we can use the Secrets functionality within Cerebrium. For our tutorial, we need to add our Github Auth token and Hugging Face Auth token to securely connect these two services. Our Github token is required to interact with the code repositories on our account and the Hugging Face token is required to access the Codestral model on HuggingFace.
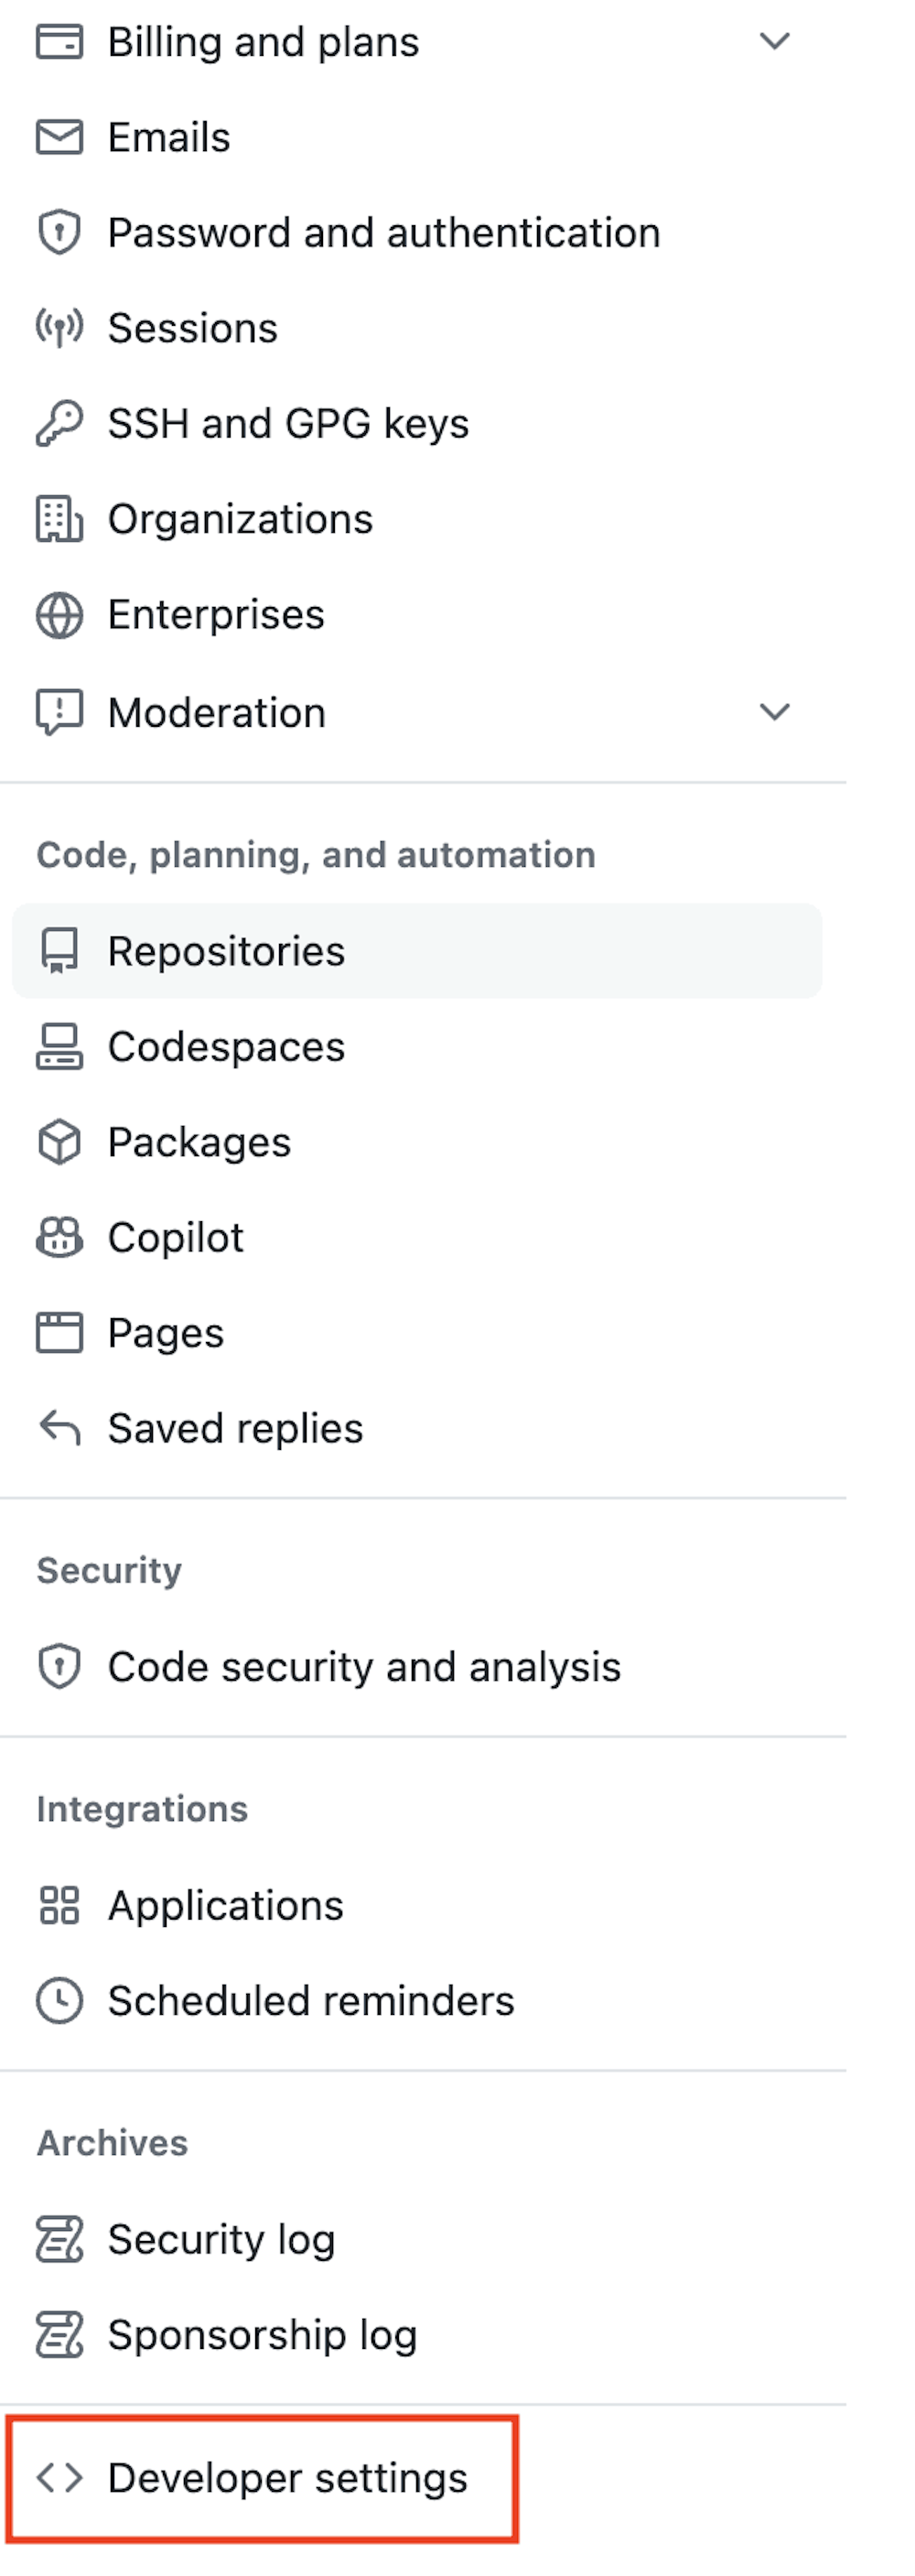
To get your Github token, click on your profile in the top right corner and click settings. At the very bottom of the sidebar, you will see developer settings.
Navigate to fine-grained access controls and give access to a specific or multiple repositories depending on which repositories you want this to be active in. I am giving access to the Cerebrium cli.

In your Cerebrium dashboard you can then add your Github token as secrets by navigating to “Secrets” in the sidebar. For the sake of this tutorial, I have called mine “GITHUB_TOKEN”. We can now access these values in our code at runtime, without exposing them in our code.

To get your Hugging Face token, you can navigate to your settings by click your profile icon in the top right. You can then navigate to “Access Tokens” in the side bar and create a token if you don’t have an existing one already. You can then copy this token to your Cerebrium secrets - we called ours “HF_AUTH_TOKEN


Creating Application on Cerebrium
Cerebrium will contain the webhook endpoint that Github will notify whenever there is activity on our repository. If you don’t have a Cerebrium account, you can create one by signing up creating a Cerebrium account and following the documentation the Cerebrium documentation to get setup
In your IDE, run the following command to create your Cerebrium starter project: cerebrium init —name winston. This creates two files:
main.py- The entrypoint file where our code livescerebrium.toml- The configuration file that contains all our build and environment settings
Add the following pip packages near the bottom of your cerebrium.toml. This will be used in creating our deployment environment. We will get to later why/when these packages are used.
[cerebrium.dependencies.pip]
"transformers" = "latest"
"torch" = "latest"
"outlines" = "latest"
"huggingface_hub" = "latest"
"sentencepiece" = "latest"
"protobuf" = "latest"
"pydantic" = "latest"
For our hardware, we need to deploy on a A6000, available on Coreweave since it comes with 48GB of GPU memory and Codestral is a large model. In order to do this, update your cerebrium.toml to reflect the following:
[cerebrium.hardware]
cpu = 3
memory = 90.0
gpu = "AMPERE_A6000"
gpu_count = 1
provider = "coreweave"
region = "us-east-1"
On Coreweave, we need to set the storage space we are going to use (this is not needed for other providers). For Codestral, we need to increase our storage space to ~100GB, you can do this with the following command:
cerebrium storage increase-capacity 100 --region coreweaveCreating Predictable output
One thing that is difficult to get right with LLM’s is to generate predictable output. Ie: generate output in the exact schema I expect every time. This is important if you have a LLM in the middle of your workflow and need to call other functions and I find prompt engineering is not 100% full proof. Outlines is a Python package that provides ways to control the generation of language models to make their output more predictable. We will use this to make our output predictable.
In out use case we are going to use to use the classification feature from Outlines. Outlines will classify output into 1 of the choices we give it. In our case of approving a users PR it will be [”approve”, or “comment”]. We then also use Outlines to do normal text generation since we don’t want to have to reimplement code using transformers (Outlines does this under the hood)
Application
Our main.py is the root file that gets executed in Cerebrium and so we can add our code there. Essentially, we will want to do the following in main.py:
Setup an endpoint to receive webhook from Github
When a webhook request is received, download the code changes and pass it to the model
The model determines if there are suggestions or if it can be approved
Comment or approve
Let us add the following:
import os
import requests
import json
from outlines import models, generate
from huggingface_hub import login
from typing import Optional
from pydantic import BaseModel
from cerebrium import get_secret

login(token=get_secret("HF_AUTH_TOKEN"))
model = models.transformers("mistralai/Codestral-22B-v0.1")
boolean_generator = generate.choice(model, ["yes", "no"])
generator = generate.text(model)

class Item(BaseModel):
    data: dict

def predict(item, run_id, logger):

    if item['action'] in ['opened', 'synchronize']:
        pr = item['pull_request']
        repo_name = item['repository']['full_name']
        pr_number = item['number']
        base_sha = pr['base']['sha']
        head_sha = pr['head']['sha']

        # Fetch the list of files changed
        files_changed = get_changed_files(repo_name, base_sha, head_sha)

        # Pass the files_changed data to your LLM processing function
        summary = process_files_with_llm("You are a coding assistant reviewing the contents of a pull request on a Github repository. Based on the given code changes, give a high level summary of what the user has changed in bullet point format. Be informative and professional",files_changed)
        leave__comment(repo_name, pr_number, summary)

        approval = boolean_generator(f"You are a coding assistant reviewing the contents of a pull request on a Github repository. I am providing you both the old and new code where deleted code is denoted by '-' and new code by '+' on the given code changes, do you you think the code changes look good to approve? If you think the PR is good to approve, responsd 'yes' otherwise respond 'no'. If it is a complex PR then respond no even if it looks correct. Here is the code: {json.dumps(files_changed)}")
        print(approval)

        if approval.strip().lower() == 'yes':
            approve_pull_request(repo_name, pr_number, "Approved by Winston")
        else:

            comments = process_files_with_llm("You are a coding assistant reviewing the contents of a pull request on a Github repository. I am providing you both the old and new code where deleted code is denoted by '-' and new code by '+' on the given code changes. Give feedback on the pull request of REQUIRED code corrections and why you think the user needs these corrections. Output the results with the filename and line number you are commenting on and the comment you have", files_changed=files_changed)
            leave__comment(repo_name, pr_number, comments)

    return {'status': 'success'}


def get_changed_files(repo_name, base_sha, head_sha):
    url = f'https://api.github.com/repos/{repo_name}/compare/{base_sha}...{head_sha}'
    headers = {'Authorization': f'token {get_secret("GITHUB_TOKEN")}'}
    response = requests.get(url, headers=headers)
    comparison = response.json()

    files_changed = []
    for file in comparison['files']:
        file_info = {
            'filename': file['filename'],
            'status': file['status'],
            'changes': file['changes'],
            'patch': file.get('patch')
        }

        files_changed.append(file_info)
    return files_changed

def process_files_with_llm(prompt, files_changed):
    # This function should call your LLM with the files_changed data
    # For example, you could send this data to an LLM API
    # Here's a placeholder for sending the data to an LLM endpoint

    return generator(f'{prompt}. Below is the code changes: {files_changed}')

def approve_pull_request(repo_name, pr_number, message):
    url = f'https://api.github.com/repos/{repo_name}/pulls/{pr_number}/reviews'
    headers = {'Authorization': f'token {get_secret("GITHUB_TOKEN")}'}
    data = {
        'body': message,
        'event': 'APPROVE'
    }
    response = requests.post(url, headers=headers, json=data)
    if response.status_code == 200:
        print(f"Pull request #{pr_number} approved successfully.")
    else:
        print(f"Failed to approve pull request #{pr_number}. Response: {response.content}")

def leave__comment(repo_name, pr_number, comment):
    url = f'https://api.github.com/repos/{repo_name}/issues/{pr_number}/comments'
    headers = {'Authorization': f'token {get_secret("GITHUB_TOKEN")}'}
    data = {
        'body': comment
    }
    response = requests.post(url, headers=headers, json=data)
    if response.status_code == 201:
        print(f"Comment added to pull request #{pr_number} successfully.")
    else:
        print(f"Failed to add comment to pull request #{pr_number}. Response: {response.content}")
Above we are doing four things things:
handle_webhook is the entry point for our Github webhook that Github notifies when one of our conditions becomes true ie: a user submits a pull request or a comment is made on the PR.
We get the contents of the changes that happened to our code repository and pass that to our our Codestral. In this case we ask it to do two things:
Summarize the code changes in bullet point format so context is easily digestible by the team upon first looking at the PR.
If the PR is simple and the model doesn’t have any important recommendations, it should output “yes” so it can be approved else it will output no and we will ask it for commentary.
If the model believes the code can be approved, we send a API request to Github notifying it that the PR can be approved.
If the model believes the code can’t be approved, we get comments from the Codestral model on possible changes and comment it on the pull request using the Github API.
Deploy to Cerebrium
To deploy this application to Cerebrium you can simply run the command: cerebrium deploy in your terminal.
If it deployed successfully, you should see something like this:

You can now call this via an API endpoint and Cerebrium will automatically scale up your application based on demand and only pay for the compute you use.
Integration with Github
Go to your Github repository that you would like to receive notifications from, go to settings on the top navigation bar and select webhooks from the options on the left. Click the “Add webhook” event in the top right

Enter your Cerebrium endpoint url as the Post URL and set the content-type to application/json. Then you can choose the events you would like to trigger this request for. In our example, we only want to trigger this workflow when a pull request is submitted or reviewed.

Click save and submit your first PR to see how it works! This is what our implementation looked like The first comment is a summary and the second is the feedback from the model

Further implementation
This was a very basic application to show that starting points of how you could implement this sort of functionality. We didn’t create a Github application since OAuth seemed out of scope for this tutorial and this application is only being used for internal repo’s rather than many external repositories.
A your code base becomes larger or pull requests become larger, you would need to implement more complex functionality. There is also a lot more you can do to make this application truly great - below are some further suggestions if you want to submit a PR to edit it.
Implement a self-correcting agent to test implemented code and suggestions works as intended. Langchain wrote a great blog LangChain's blog post about how to do this in Langchain. You can still deploy this on Cerebrium.
Implement comments on specific lines since its easier for engineers to follow logic and correct it. In order to do this we recommend checking out the outlines JSON schema functionality in order to get the files, line numbers and comments that you can then use the Github API to comment on.
Conclusion
By automating the PR approval process with Mistral’s Codestral model for smaller changes, we significantly reduce delays caused by manual reviews, enhancing our team’s productivity and efficiency. This approach ensures that only well-tested and low-complexity changes are automatically approved, maintaining high code quality. Deploying this with Cerebrium provides a easy way to scale this to 100’s of PR’s across 100’s of repositories while only paying for the compute you use.
If you are keen to build on this example, submit a pull request, otherwise send us some of your recommendations of how we can make it better.