Building a Real-Time Shopping Assistant: Turn Live Video into Instant Purchases

Michael Louis
CEO & Founder


Building a Real-Time Shopping Assistant: Turn Live Video into Instant Purchases
Most content published today comes in the form of video. Video content is very rich in data since it has both audio data and visual data that we can extract to create innovative solutions. Well, what if we could create a product that not only analyzes video content as it streams but also transforms it into actionable insights and delivers value to the end user in real-time.
In this tutorial, we show how you can create a realtime shopping assistant; create the ability to recognize items shown in a live video stream and buy them instantaneously. This technology requires the stitching together of many technologies (video streams, ML Models, vector DBS etc) and we’re here to walk you through each step, in the hopes it will inspire you to expand on the idea and build something great!
You can look at the final demo the live demo and codebases the example code on GitHub and the frontend repo on GitHub.
Concepts
This tutorial covers many different concepts using a variety of tools in order to achieve the end functionality. Below is a summary about what each section covers so you can skip to the section you are most interested with - if you don't want to go through the entire article:
Daily - We use Daily to extract video frames from the live stream every 150ms. This allows us to run object detection and our search function on each frame.
Yolov8: We use a custom trained Yolov8 model to detect objects in our live stream that we must search for.
Turso: We store our product catalog in Turso's embedding database that searches for matches against the detected objects.
Supabase: We use Supabase to store detected images and we store items found via our search function in a database that allows our client application to update with the results in real-time.
Serp API (Bonus): We use the SERP API to search Google for a product match using only the image of the detected item.
Cerebrium setup
First let us create our Cerebrium project. If you don’t have a Cerebrium account, you can create one by signing up creating a Cerebrium account and following the documentation the Cerebrium documentation to get setup.
In your IDE, run the following command to create our Cerebrium starter project: cerebrium init ecommerce-live-stream. This creates two files:
main.py- Our entrypoint file where our code livescerebrium.toml- A configuration file that contains all our build and environment settings. This will be used in creating our deployment environment.
Cerebrium is the underlying platform on which our entire application will run. As we go through the tutorial, we will edit the two files above as well as add additional files.
Setup Daily:
Daily provides developers with powerful APIs and SDKs to easily integrate real-time video and audio capabilities into their applications. In order to implement the functionality to pick up the frames from a live stream, we need to use a product like Daily that allows us to do this.
If you don’t have an account you can sign up for one a Daily account (they have a generous free tier). Next, we need to get our Daily developer token from our profile in order to authenticate calls.Navigate to the “developers” tab in order to fetch your API key and add this to your Cerebrium Secrets.


First we need to create the endpoints that create our Daily room that both us and our users can join - this is the live stream that we will monitor. You can look at the Daily Docs to see the options available to you. Create the following code in your main.py:
import requests
from cerebrium import get_secret

def create_room():
    url = "https://api.daily.co/v1/rooms/"
    headers = {
        "Content-Type": "application/json",
        "Authorization": f"Bearer {get_secret('DAILY_TOKEN')}"
    }
    data = {
        "properties": {
            "exp": int(time.time()) + 60*5, ##5 mins
            "eject_at_room_exp" : True
        }
    }

    response = requests.post(url, headers=headers, json=data)
    if response.status_code == 200:
        room_info = response.json()
        token = create_token(room_info['name'])
        if token and 'token' in token:
            room_info['token'] = token['token']
        else:
            print("Failed to create token")
            return {"message": 'There was an error creating your room', "status_code": 500}
        return room_info
    else:
        return {"message": 'There was an error creating your room', "status_code": 500}

def create_token(room_name: str):

    url = "https://api.daily.co/v1/meeting-tokens"
    headers = {
        "Content-Type": "application/json",
        "Authorization": f"Bearer {get_secret('DAILY_TOKEN')}"
    }
    data = {
        "properties": {
            "room_name": room_name,
            "is_owner": True,
        }
    }

    response = requests.post(url, headers=headers, json=data)
    if response.status_code == 200:
        token_info = response.json()
        return token_info
    else:
        print(f"Failed to create token: {response.status_code}")
        return None
You will see we use our Daily Token to authenticate these requests. Later in the tutorial we will show you how to connect these API endpoints to our frontend repository.
Next, we need to start receiving the frames from our live stream - this will allow us to run object detection on each frame to search our product database for a match. Daily previously wrote a blog of what it is like to perform actions on a live stream using Cerebrium. It contains a lot of the in-depth explanations about the setup, how it works and how to go about the implementation.
First let us create our Detection object that will join our Daily call and monitor frames. Create a file called detection.py.
from daily import *
import queue
import threading

class ObjectDetection(EventHandler):
  def __init__(self, room_url):
    self.client = CallClient(event_handler = self)
    self.is_running = True
    self.message_sent = False
    self.queue = queue.Queue()
    self.room_url = room_url
    self.consecutive_detections = {}  # To track consecutive detections


    self.camera = Daily.create_camera_device("my-camera", width = 1280, height = 720, color_format = "RGB")
    self.client.update_inputs({
        "camera": {
            "isEnabled": True,
            "settings": {
            "deviceId": "my-camera"
            }
        },
        "microphone": False
    })

    #Since frames are sent every 30ms, we only want to send one every 150ms
    self.frame_cadence = 5
    self.frame_count = 0
    self.thread_count = 0
    self.detected_items = set()  # Set to keep track of detected items

  def on_video_frame(self, participant, frame):
    self.frame_count += 1
    if self.frame_count >= self.frame_cadence and self.thread_count < 5:
      self.frame_count = 0
      self.thread_count += 1

      self.queue.put({"buffer": frame.buffer, "width": frame.width, "height": frame.height})

      worker_thread = threading.Thread(target=self.process_frame, daemon=True)
      worker_thread.start()
What we are doing above is:
We are creating a synthetic camera for the call so we can show the user the objects we are detecting if they want to see, however, you can remove this if you want them just to be a silent observer.
We then want to have a function that processes every frame sent from the Daily stream and then performs some functionality on it. Daily sends frames every 30ms which is very frequent so we implement two things in order to combat this since object detection and searching for an item takes longer than 30ms.
We only look at every 5th frame - ie every 150ms
We add each 5th frame to a queue that we then process sequentially.
Now before we write the logic for our process_frame function, let us update our main.py that joins our Daily call and initializes our object detector.
from daily import *
from multiprocessing import Process

def predict(room_url: str, run_id: str):
    from detection import ObjectDetection
    bot_name = "Item Detector"

    Daily.init()

    object_detector = ObjectDetection(room_url)
    client = object_detector.client

    client.set_user_name(bot_name)
    ##only join if not in call already
    object_detector.join(room_url)
    for participant in client.participants():
        if participant != "local":
            client.set_video_renderer(participant, callback = object_detector.on_video_frame)
    try:
        while object_detector.isRunning():
            print('sleeping')
            time.sleep(10)
    except:
        print('\nIssue detected')

    client.leave()
    return {"message": "Call has finished running"}


def start(room_url: str, run_id: str):

    process = Process(target=predict, args=(room_url, run_id), daemon=True)
    process.start()
    process.join()  # Wait for the process to complete
    return {"message": "Call finished"}
Essentially what we do here is we create our ObjectDetector object and get it to join our Daily room. We then add the on_video_frame() function to all the participants video streams (this demo was not tested to work with multiple participants joining but it could)
We run the predict() function in a separate process since the Daily SDK doesn’t like reusing the same execution context so we process it in a different thread until it returns. So the /start endpoint is our entry point.
In order to add Daily to our Cerebrium project you can add the following to our toml:
[cerebrium.dependencies.pip]
daily-python = "latest"
Setting up YOLOv8
We will be using YOLOv8 in order to do object detection for each frame in our live stream. YOLO is very generalized and only picks up a limited number of labels with variable accuracy. We therefore recommend training your own YOLOv8 model based on the items you would like to detect. It is extremely easy to label your data and fine tune on your own products using a platform like Roboflow. You can see a notebook on how to do this this YOLOv8 training notebook.
We create the following function inside our ObjectDetection class
from ultralytics import YOLO
import cv2
from PIL import Image

model = YOLO("./best.pt")  # load your trained model otherwise "yolov8n.pt"
device = torch.device("cuda:0" if torch.cuda.is_available() else "cpu")
model.to(device)

def process_frame(self):
    item = self.queue.get()

    try:
        image = Image.frombytes('RGBA', (item["width"], item["height"]), item["buffer"])
        image = cv2.cvtColor(np.array(image), cv2.COLOR_RGBA2BGR)

        detections = model.predict(image, verbose=False)

        if len(detections[0].boxes) > 0:
            for box in detections[0].boxes:
                class_id = int(box.cls.item())
                class_name = model.names[class_id]
                confidence = float(box.conf.item())

                if class_name.lower() == 'person':
                    continue

                print(f"Detected {class_name} with {confidence:.2%} confidence")
                if confidence > 0.55:
                    if class_name not in self.consecutive_detections:
                        self.consecutive_detections[class_name] = 1
                    else:
                        self.consecutive_detections[class_name] += 1
                else:
                    self.consecutive_detections[class_name] = 0

                if self.consecutive_detections.get(class_name, 0) > 3:
                    x1, y1, x2, y2 = map(int, box.xyxy[0])


                    if class_name not in self.detected_items and class_name.lower() != 'person':
                        detected_object = image[y1:y2, x1:x2]
                        print(f"added {class_name}")
                        self.detected_items.add(class_name)
                        self.search_image(detected_object)


                # Reset counts for classes not detected in this frame
                for class_name in list(self.consecutive_detections.keys()):
                    if class_name not in [model.names[int(box.cls.item())] for box in detections[0].boxes]:
                        self.consecutive_detections[class_name] = 0

    except Exception as e:
        print(f'\nIssue converting image and detecting: {e}')

    self.thread_count -= 1
    self.queue.task_done()
    return
Above we are taking a frame off the queue and then sending it to our YOLO model. We then look for cases where our YOLO model is 55% sure it has correctly identified an item and we are avoiding items that are identifying people (we can’t shop that). We then do two additional checks:
Since items are moving on camera, we found the items in the frame to be a bit blurry until they finally stabilized on screen. So we created the functionality that we only recognize an item if we predict it 3 times in a row with an accuracy above 55%. That means our model saw it 3 times in 450ms so we can be more sure of our prediction. This seemed to impact better end results we display to the user since blurry photos don’t search well.
To avoid showing a user duplicate items, we store the class of the items that passes our search criteria. This means we can only show a user a specific class of item once. This is pretty rudimentary and just for demo purposes. We elaborate on how to make this better in the improvements section at the end of this tutorial.
If all our search criteria passes, then we want to send the item to our search_image() function that searches our database for the image - we will create this shortly. Lastly, we signal to our ObjectDetection object that the thread has stopped running and its ready to process the next item.
Our search_image() function can be very flexible in that you can search a vector database matching on the image or you can search the internet. In the next sections we will show how.
Lastly, we need to add the ultralytics for our package to our pip dependencies in order to run YOLO.
[cerebrium.dependencies.pip]
#...existing packages
"ultralytics" = "latest"
Setting up Turso
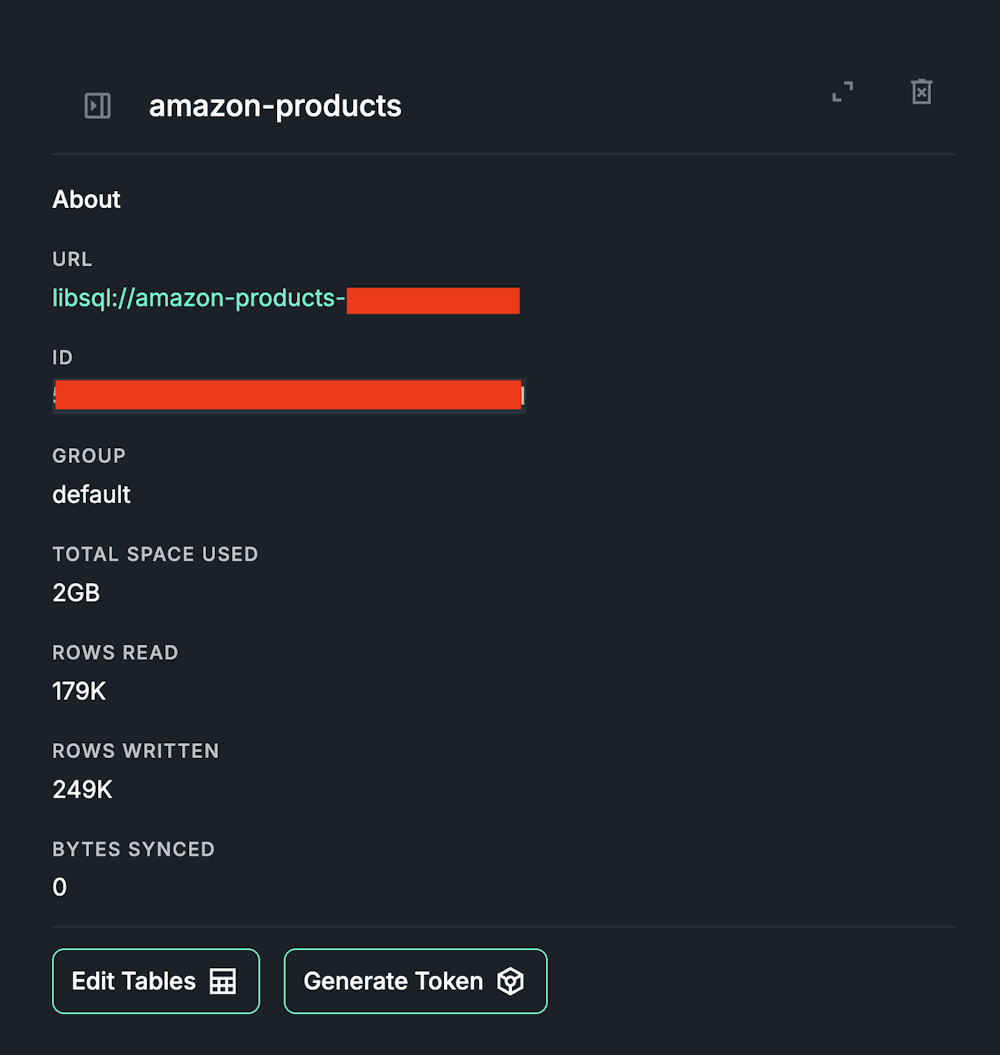
Turso is a Edge SQLite database. We use them in production at Cerebrium and have been very happy with their developer experience and their low latencies. They recently released a vector DB offering so we thought we would give it a try. We will be using Turso to store the embeddings of our product catalog and then search against it for the closest match.
You can sign up for an account here - they are very affordable at scale. We won’t show you how to insert your product catalog into Turso since that's out of scope for this article but you can read the documentation the Turso documentation and Turso's vector-search guide on how to achieve this.
In order to do our search, we need to convert our image frame to a vector embedding and then query that embedding against our Turso DB - embeddings make it easier to search for similarity across images. You need to use the same embedding model here that you used to transform your product catalog in the first place. In this example we use the nomic-embed-vision-v1.5 model from Nomic. Below is our code to implement this:
#Define this at the top of your detection.py
from transformers import AutoTokenizer, AutoModel, AutoImageProcessor
import torch.nn.functional as F
import libsql_experimental as libsql

processor = AutoImageProcessor.from_pretrained("nomic-ai/nomic-embed-vision-v1.5")
vision_model = AutoModel.from_pretrained("nomic-ai/nomic-embed-vision-v1.5", trust_remote_code=True)

url = get_secret("TURSO_DB_URL")
auth_token = get_secret("TURSO_AUTH_TOKEN")

conn = libsql.connect("products.db", sync_url=url, auth_token=auth_token)
conn.sync()
We define this at the top of our detection.py so it is only instantiated once - this speeds up processing since loading a model into VRam takes a few seconds. Add your Turso database url as well as the authentication token for that database to your Cerebrium secrets - you can get this by clicking on your database in the Turso Dashboard
You will need to add the following to your cerebrium.toml
[cerebrium.dependencies.pip]
#...existing packages
transformers = "latest"
Next we write our function to search our Turso database. We take the image from our frame, embed it using the Nomic model and then search our database for it
def search_db(self, image):
    inputs = processor(image, return_tensors="pt")
    img_emb = vision_model(**inputs).last_hidden_state
    img_embeddings = (F.normalize(img_emb[:, 0], p=2, dim=1)).detach().numpy().tolist()

    results = conn.execute("SELECT * FROM products WHERE vector_distance_cos(embedding, ?) LIMIT 1;", (str(img_embeddings[0]),)).fetchall()
    return results[0]
In the next section we will show you how to use the results to display them to the user
Setting up Supabase
Supabase is a open-source Firebase alternative. We will be using their realtime functionality in order to display the e-commerce products we find to the user in realtime on our frontend application.
To start, sign up to Supabase Supabase and create a project. Once created, let us create our database object - when items are added to the database, supabase will render it on our frontend.
Create a table, products, that enables Row Level Security (RLS) and Enable Realtime. Create it with the following schema
id: int8 (primary key)
created_at: timestampz
name: text
description: text
price: float4
image_url: text
url: text
run_id: text
Once created, let us edit the RLS. We want to create two policies:
On Insert: Enable for anon and authenticated users
On Select: Enable for the anon. You can of course change this

The above is saying that only a client with our Anon key can insert and select records into the database.
You will also need to add the following to your cerebrium.toml pip packages
[cerebrium.dependencies.pip]
#...existing packages
supabase = "latest"
Now insert the following code into the detection object:
from supabase import create_client

supabase = create_client(get_secret("SUPABASE_URL"), get_secret("SUPABASE_ANON"))

def search_image(self, image):

    search_result = self.search_db(image)[0]

     supabase.table("products").insert({
       "name": search_result['title'],
       "description": "",
       "price": str(search_result.get('price', {}).get('extracted_value', 0.00)),
       "image_url": search_result["thumbnail"],
       "url": search_result['link'],
       "run_id": self.room_url,
       "original_image": image_result['url']
    }).execute()
The above function searches our vector database and then adds the results to our products database in supabase. Once it's added it will be detected and displayed by our frontend. Don’t forget to add your Supabase url and Anon key to your Cerebrium secrets - you can find the details in your project settings.

Searching the internet (bonus)
Another implementation for search is to search the internet instead of our vector db. In order to search the internet for an item we use the Google Lens API which is very easy to use via the SerpAPI. You can create an account a SerpAPI account.
We can then create the following function in our detection object:
from serpapi import GoogleSearch

def search(self,url):
    params = {
        "engine": "google_lens",
        "url": url,
        "api_key": get_secret("SERP_API")
    }

    search = GoogleSearch(params)
    results = search.get_dict()
    amazon_results = [item for item in results["visual_matches"] if item.get("source") == "Amazon.com" and "price" in item]

    if amazon_results:
        # Return the first Amazon result with a price
        return amazon_results[0]
    else:
        # If no Amazon results, find the first result with a price
        for item in results["visual_matches"]:
            if "price" in item:
                return item


    # If no results with price found
    return None

 def uploadImage(self, image):
    import uuid
    import tempfile
    import os

    random_uuid = uuid.uuid4()

    # Convert the UUID to a string and use it in the filename
    filename = f"{self.room_url}_{random_uuid}.png"
    with tempfile.NamedTemporaryFile(delete=False, suffix='.png') as temp_file:
        temp_filename = temp_file.name
        cv2.imwrite(temp_filename, image)

    # Upload the file
    try:
        with open(temp_filename, 'rb') as f:
            result = supabase.storage.from_("products").upload(
                file=f,
                path=filename,
                file_options={"content-type": "image/png"}
            )
# Construct the public URL
        public_url = supabase.storage.from_("products").get_public_url(filename)

        return {"result": result, "url": public_url}
    finally:
        # Clean up the temporary file
        os.unlink(temp_filename)

#edited search_image function
  def search_image(self, image):

    image_result = self.uploadImage(image)
    search_result = self.search(image_result['url'])

    #...add product to Supabase database
You should find your API key on your main account dashboard which you will need to add to Cerebrium.

Google Lens requires you to send a URL of the image you would like to search, so we store it in our Supabase storage bucket before sending it over.
From Google Lens, we specifically look for results from Amazon results but that was for the purpose of the demo. You can then use this to replace the search_db function and keep the flow the same - ie: add the result to the database to be picked up form the frontend.
You will also need to add the following to your cerebrium.toml pip packages
[cerebrium.dependencies.pip]
"google-search-results" = "latest"
Deploy Application on Cerebrium
You are now ready to deploy this application on Cerebrium! Run:
cerebrium deploy
Once successful you should see your base endpoint url returned to you - you will need this in the next section. Your endpoint is now available and will scale serverlessly where you only pay for the compute you need!
Setting up frontend
To get started, you can clone the following Github repository:
git clone https://github.com/CerebriumAI/live-stream-shopper>In the .env file, populate your Supabase credentials as well as the base url of your cerebrium deployment in the format:
Then you can run:
yarn
yarn dev
You should now be able to show items in the browser (depending on the model you used, be sure to use those items to test it).
How to improve
This is a section on what we can possibly improve on in order to make this experience better
Instead of only detecting a class image once and never again, I would store the embeddings of previously searched items and if an image makes it through the search criteria you can compare it to past embeddings. This means you could search multiple books, cups etc.
Train a better model. We trained our model on 6 classes (book, shoe, watch, cup etc) and about 40 images. Depending on your use case, I would train it on a lot more data for your use case to get more accurate.
Facebook recently released their SAM 2 model that can follow items through a video. It would be very cool to incorporate this, showing a user what items have already been searched as time progresses.
Conclusion
This tutorial showed how to create a real-time e-commerce shopper that can detect and search items with extremely low latencies. This end-to-end solution is very affordable to run at scale which shows the type of data you can extract from video’s in realtime and hopefully gives engineers and companies inspiration to create more solutions off the back of this.
Please tag @cerebriumai in what you build - we would love to support you!